Steps in Designing FIR Filters
1) Setting the Filter Specifications
2) Setting the Filter Frequency Specifications
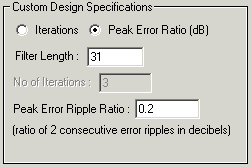
3) Setting the Custom Design Specifications
a) Auto Design
![]()
![]()
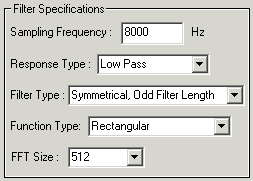
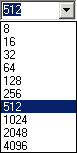
1) Setting the Filter Specifications
Enter the sampling frequency to work with. (default value: 8000)

![]()
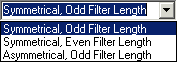
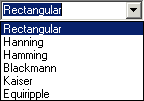
2) Setting the Filter Frequency Specifications
a) Window Functions Specifications (Normal Window Functions Design)
Key in the 1st cutoff frequency. (eg. 1000)

b) Equiripple Specifications (Equiripple Design)
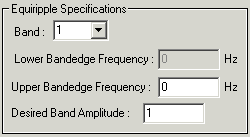
![]()
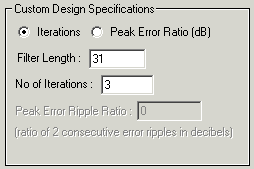
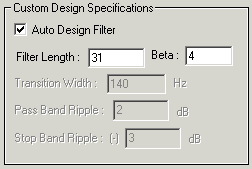
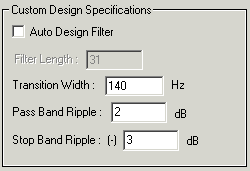
3) Setting the Custom Design Specifications
a) Auto Design (Windows Functions Only)
b) Manual Design (Windows Functions Only)
c) Equiripple Design (Weighted Least Squares Only)
![]()
![]()
![]()
